
Application Tutorial using SVG Animations
Serious applications do not have to be dull and boring. While function is most important, beauty should not be ignored. Beauty has value on its own, and it can also spark interest in users to discover more functionality and get more out of the application. This article is intended mainly as inspiration, with some example code for Delphi FMX.
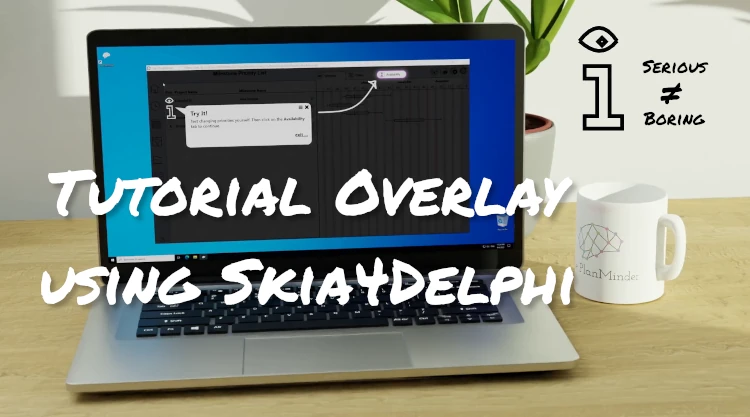
A modicum of animation can be used to create what designers call delight in a user interface. Too much, and it becomes an annoyance. The Skia4Delphi framework enables easy access to SVG-based animations. For those of us who mainly create “serious” applications, the extensive possibilities of Skia may be nothing more than an interesting curiosity.
This post will show an example of how Skia animations can come into use in a tutorial overlay function, hopefully as an inspiration to show that serious is not synonymous with boring.
Guiding users through The PlanMinder
The PlanMinder is a project planning tool. It helps project teams make better decisions and save time on administration, mainly by using automatic scheduling, automatic feedback from time reports and by uncertainty calculations. It is easy enough to use, but if you expect just another Gantt chart or ToDo-list application, you may be confused.
To help especially those who just want to get started, without reading or watching a video first, we created a tutorial mode. You can see it in action in the video, or you can download the demo yourself from theplanminder.com.
For full video resolution, open in YouTube.
The tutorial mode opens up an overlay that shows information and points out elements of the user interface. It is triggered by specific events, or activated explicitly by the user. It is available in the demo version where there are some example projects, and where the user safely can experiment with the tool.
We named the little animated i Ippy.
Ippy, only half as annoying as Clippy
Those of us that remember Microsoft’s Clippy, may not do it very fondly. This teaches us that you have to be careful when implementing a help system to avoid it being an annoyance.

Ippy is triggered in three ways:
- Automatically when the user enters a screen for the first time in the order prescribed by the tutorial, making it easy to follow the guidance while also being able to explore freely.
- By showing “excitement” by animating the i in the corner when the user is on a screen for which the tutorial has not yet been viewed. The tutorial chapter is displayed when (and if) the user clicks on the i.
- By the user clicking on the i when it is not animated. This brings up a menu of available chapters for the open screen.
The tutorial is divided into chapters. Each chapter is a sequence of information screens overlayed on the user interface, explaining features and concepts and pointing out elements of the user interface. For some screens there are more than one chapter, letting the user test things for themselves before continuing.
Animation: Poses and SVG interpolation
The base for these animations is the TSkAnimatedPaintBox. It has the event OnAnimationDraw, called to draw each frame of the animation.
procedure(ASender: TObject; const ACanvas: ISkCanvas; const ADest: TRectF; const AProgress: Double; const AOpacity: Single) of object;
The argument AProgress is a value between 0 and 1 defining time. When AProgess is 1, time has reached the value of the Animation.Duration property.
For the Ippy figure we use ISkPath to draw svg on the canvas. We define one IskPath as a starting pose for the animation, and one for the end pose. Then we use the Interpolate function to calculate all intermediate steps.
As an example, we can define the eye of Ippy as:
              StartPath := TSkPath.Create(
                '''
                  M25,20 c10,10 20,10 30,0
                  M25,20 c10,-15 20,-15 30,0
                  M37,20 l3,-3 3,3 -3,3 z
                '''
              );

If the end pose ISkPath has the same number and same types of svg elements, they can be interpolated between. Like this closed eye:
              EndPath := TSkPath.Create(
                '''
                  M25,20 c10,5 20,5 30,0
                  M25,20 c10,-5 20,-5 30,0
                  M37,20 l3,-3 3,3 -3,3 z
                '''
              );

StartPose.IsInterpolatable(EndPose) can be used to check that two paths are compatible for interpolation
The animation can be implemented as:
ACanvas.DrawPath(EndPath.Interpolate(StartPath, AProgress), LinePaint);

The OnAnimationFinish event triggers when the final frame of the animation has been drawn, and can be used to chain animations.
Easing and animation sequences
AProgress linearly increases with time. If you are familiar with TAnimate objects you know they have an Easing property. With TSkAnimatedPaintBox you will have to apply easing yourself. The most commonly used easing is quadratic.
              function Ippy_Animate_Easing(t: double; Easing: TIppyEasing): double;
              var
                t_eased: double;
              begin
                case Easing of
                  IPPY_LINEAR: begin
                    t_eased := t;
                  end;
                  IPPY_SIN: begin
                    t_eased := sin(t*Pi/2);
                  end;
                  IPPY_CIN: begin
                    t_eased := Power(t, 3);
                  end;
                  IPPY_COUT: begin
                    t_eased := 1 - Power(1-t, 3);
                  end;
                  IPPY_CINOUT: begin
                    if t < 0.5 then
                      t_eased := 0.5 * Power(2 * t, 3)
                    else
                      t_eased := 1 - 0.5 * Power((-2 * t + 2), 3);
                  end;
                  else begin
                    t_eased := t;
                  end;
                end;

                result := t_eased;
              end;
Implementing Ippy we defined transitions as a start and end pose, duration and easing function. Then we defined animations as sequences of transitions to be triggered by events.
It is definitely possible to translate and scale your ISkPath poses to create movement. We ended up letting the Ippy figure live in its own TSkAnimatedPaintBox that we scaled and moved around the screen as its own layer.
The Tutorial Overlay: Clip and Blend
When activated, the tutorial overlay is a TSkAnimatedPaintBox that covers the whole frame. It is filled with a semitransparent color that still lets you see the user interface underneath. The overlay has HitTest set to true when active to disable the normal user interface.
When highlighting a button or part of the user interface, we literally cut a hole in the canvas. HighLightPath is an ISkPath that defines the outline of what we are highlighting. ISkCanvas.ClipPath lets us clip a hole that we later can “repair” using ISkCanvas.Restore. This is the code sequence that fills the paint box with the transparent background color, except for the highlighted area which is fully transparent and encircled.
              ACanvas.ClipPath(HighLightPath, TSkClipOp.Difference, true);
              ACanvas.DrawColor(bgDark, TSkBlendMode.SrcOver);
              ACanvas.Restore;
              ACanvas.DrawPath(HighLightPath, HighLightPaint);
              ACanvas.DrawPath(HighLightPath, HighLightBlurPaint);

The HighLightPath is animated to pulsate by scaling when stationary, and by scaling and translation when in transition. A helper function creates an ISkPath with a unit circle with diameter 100 at coordinates 0,0. It is then transformed to the desired size and placement using:
result.Transform(TMatrix.CreateScaling(diameter/100, diameter/100)).Transform(TMatrix.CreateTranslation(x,y));
The area for text in the speech bubble is drawn and animated in a similar way as the highlight. It is cutout from the canvas before the dark fill, and then drawn with a white transparent color.
              LPaint := TSkPaint.Create;
              LPaint.SetARGB($F4, $FF, $FF, $FF);
              LPaint.Blender := TSkBlender.MakeMode(TSkBlendMode.SrcOver);
              LPaint.Style := TSkPaintStyle.StrokeAndFill;
              LPaint.AntiAlias := true;
              LPaint.StrokeWidth := 5;

              ACanvas.DrawPath(SpeechBubbleRectanglePath, LPaint);
              ACanvas.DrawPath(SpeechBubblePointPath, LPaint);
The contents of the speech bubble is hosted in a TVertScrollBox whose position and size is animated, as well as its opacity for text transitions.
TskBlendMode.SrcOver is used for the semi transparent parts of the overlay, where the underlying user interface is intended to shine through. For the solid lines TskBlendMode.SrcATop is used. Other blend modes can be used to create interesting effects.
Arrows and fonts
The overlay sometimes uses an arrow to point out things, combined with a short text describing what the arrow points at. It is designed to have the feeling of drawing on a whiteboard.
To animate drawing a shape defined by an ISkPath, there is a trick using the line style definition. The line style, including dashes and dots, is defined by the ISkPaint used to draw the line.
ISkPaint.PathEffect can be set by calling TSkPathEffect.MakeDash(const AIntervals: TArray<Single>; const APhase: Single): ISkPathEffect;
Defining a dash pattern of a line and a gap long enough to cover the whole arrow, the drawing can be animated using the APhase parameter. Starting with just the gap, the line part is then gradually phased in until all of the path is drawn. ISkPathMeasure can be used to calculate the length. Preferably once, outside of the on draw event handler.
              var PathMeasure: ISkPathMeasure := TSkPathMeasure.Create(ArrowPath, false);
              var PathLength: single := PathMeasure.Length;
              DrawPaint.PathEffect := TSkPathEffect.MakeDash(
                [PathLength, PathLength],
                PathLength - PathLength * AProgress
              );
The font for the text is also chosen to give a whiteboard look and feel. Google fonts have a suitable free font called PermanentMarker. The tff file is embedded as a resource and is loaded using:
              ResStream := TResourceStream.Create(hInstance, PermanentMarkerResourceName, RT_RCDATA);

              try
                FontWhiteBoard := TSkFont.Create(TSkTypeface.MakeFromStream(ResStream), 23);
              finally
                ResStream.Free;
              end;
The font is used when drawing text on the canvas:
              TextPaint := TSkPaint.Create;
              FontWhiteBoard.Size := 30;
              FontWhiteBoard.MeasureText(HintText, Bounds);
              TextPaint.Color := $FFFFFFFF;
              TextPaint.AntiAlias := true;
              ACanvas.DrawSimpleText(
                HintText,
                x + w, y + 0.5 * Bounds.Height + h,
                FontWhiteBoard,
                TextPaint
              );
Tutorial Engine and Content Creation Tool
To keep track of all animations, content and when to show what, there is a tutorial engine. Switching tabs and activating certain functions feeds events to this engine. It keeps track of what to show when, current state of animations and what already has been shown. All is defined in a json file loaded at startup.
This files contains poses for Ippy, transitions between poses and animations that are sequences of poses.
It also contains Instruction steps defining all individual speech bubbles with contents position, highlight, arrow etc. Chapters defines sequences of Instruction Steps, and when they should be triggered and if there are preconditions to when they can be triggered.
Once you know what you want to achieve and have a data structure for it, creating an engine is fairly straightforward. To efficiently create and maintain contents for the engine you also need to create a tool for it. Depending on your level of ambition this can be a significantly larger task.
About The PlanMinder

The PlanMinder is designed to save time on project administration and to give you more information to make better decisions.
It is born out of the needs and experiences from an R&D team working with embedded products. The multidisciplinary nature of embedded product development requires planning to coordinate when experts are available to do their part in different projects. Projects often faces uncertainty both in the form of known and unknown difficulties and in logistics. The team may be required to handle urgent product maintenance and changing priorities, interfering with existing plans.
To handle this The PlanMinder is built around automatic scheduling and the concept of continuous planning. The plan is created independently from the timeline. The scheduler calculates when. Time reports are automatically fed back to the scheduler, so that work that did not happen today is scheduled for tomorrow instead.
Time estimates are made with uncertainty. One number for the best case scenario, and one with enough time that you can be reasonable sure it will be enough. These uncertainty estimates are used by the scheduler to calculate the accumulated effect on milestones and deadlines, over all projects sharing resources. By monitoring the probability that you will reach a deadline in time as work progresses, you will get an early warning if you need to take action. The cause may be the risk of a delay in a different project you otherwise would have a difficult time noticing and determining the effect of.
The automatic scheduler makes it easy to change plans. Drag and drop to change priority, and immediately see how it affects milestones. Create scenarios to experiment and compare what effect different changes has before making important decisions.
The PlanMinder not only help teams to be more efficient and more reliably meet deadlines. More importantly it improves working conditions for everyone involved. Bad planning leads to stress, which is a serious health problem.
Learn more and download the application at theplanminder.com.